
Trigger warning.
Stop! Don’t look at the following photographs if you are offended by ugly applications of hot glue.
I found what I thought would be the ideal case for the camera and Pi in the kitchen. It was one of those Tesco plastic food boxes with clips and a watertight seal, and it had nasty cracks in the base in just the right spot to cut a hole for the lens. Using a variety of inappropriate tools, I made the necessary hole, and fixed the lens into it with hot glue.

As I warned you, very ugly hot glue. Note that it covers the join between the two parts of the lens, which I hope will ensure our good Welsh rain can’t get in between the lens elements. The next steps were to screw the inner lens cap in place, and mount the Raspberry Pi Zero inside the box. I was going to put it in the same part of the box as the lens and camera, but every arrangement I tried had the USB wireless antenna rather close to the camera and its cable. So, I mounted the Pi Zero in the lid of the box with a goodly lump of White Tac.

A notch in the edge of the box, for the power cable, was the next thing. It’s at the bottom, and only a very small percentage of the rain around here falls upwards, so it may be OK without any sealant. I have more White Tac if there is a problem…
Software
Getting the camera to take a picture every ten minutes is not a problem, thanks to cron and the bash shell.
The intention is to use lftp to upload the pictures to the web host, but finding a decent example of code that will do that is not proving easy. Please feel free to comment if you have something suitable.
I shouldn’t have too much difficulty hacking out a web page for the picture to live in, as I am not planning anything fancy, so I’ll just use HTML, like the rest of my site.


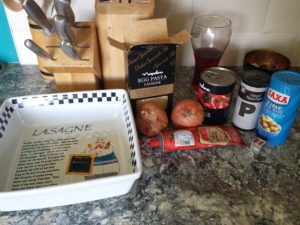 Here are some of the things I used to make a recent lasagne. It’s fairly hard to see, but there’s a bowl of home grown garlic at the back, on the right. Just push garlic cloves that are too small to bother peeling into the ground. A few months later, they will have multiplied enormously, and somehow pulled themselves down until they are six inches underground. I have no idea how they manage to do that, but they do. I must remember to ask my favourite botanist, if he ever visits us.
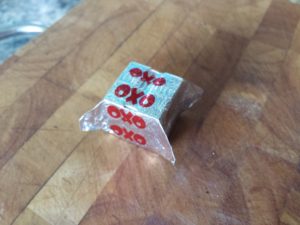 This is the humble, yet powerful, Oxo cube that I used, to flavour the rather insipid looking beef mince. Some people tear the foil off, and crumble the cube with their fingers. Try this… Pull the little flaps out as shown, and hit the cube a couple of times
 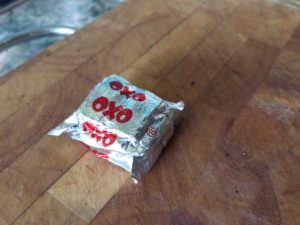 with your palm, until it is flattened. Now you can just rip it and tip the powdered Oxo straight into the pan. Isn’t that clever? I would credit the source of the tip, if I could remember it.
 That meat will need to be browned properly, of course, before you carry on making the sauce, but you know that, don’t you? I wasn’t following a recipe, just doing what seemed likely to be the way I have made lasagne before.
 Now some recipes have you put layers of sauce in with the layers of meat and pasta. I don’t do that, mainly because it increases hugely the amount of sauce you will need, and tends to make the final dish sloppy. I have been known to put in layers of grated cheese, and that can work quite well, but this lasagne didn’t have any.
 ends up knowing how to do without measuring things. A lump of butter of a certain size. A big, but not too big, spoonful of flour. Do not forget Colman’s mustard powder, about half a teaspoonful. It’s not enough to make the sauce taste mustardy, but it will seem dull if you forget to put it in.
  The butter and flour have to be cooked until there is what one recipe book describes as a “biscuity smell”.
 cheese. Please use a decent Cheddar, not soapy cheap stuff.
 picture, along with a salad that miraculously appeared while the lasagne was cooking.