
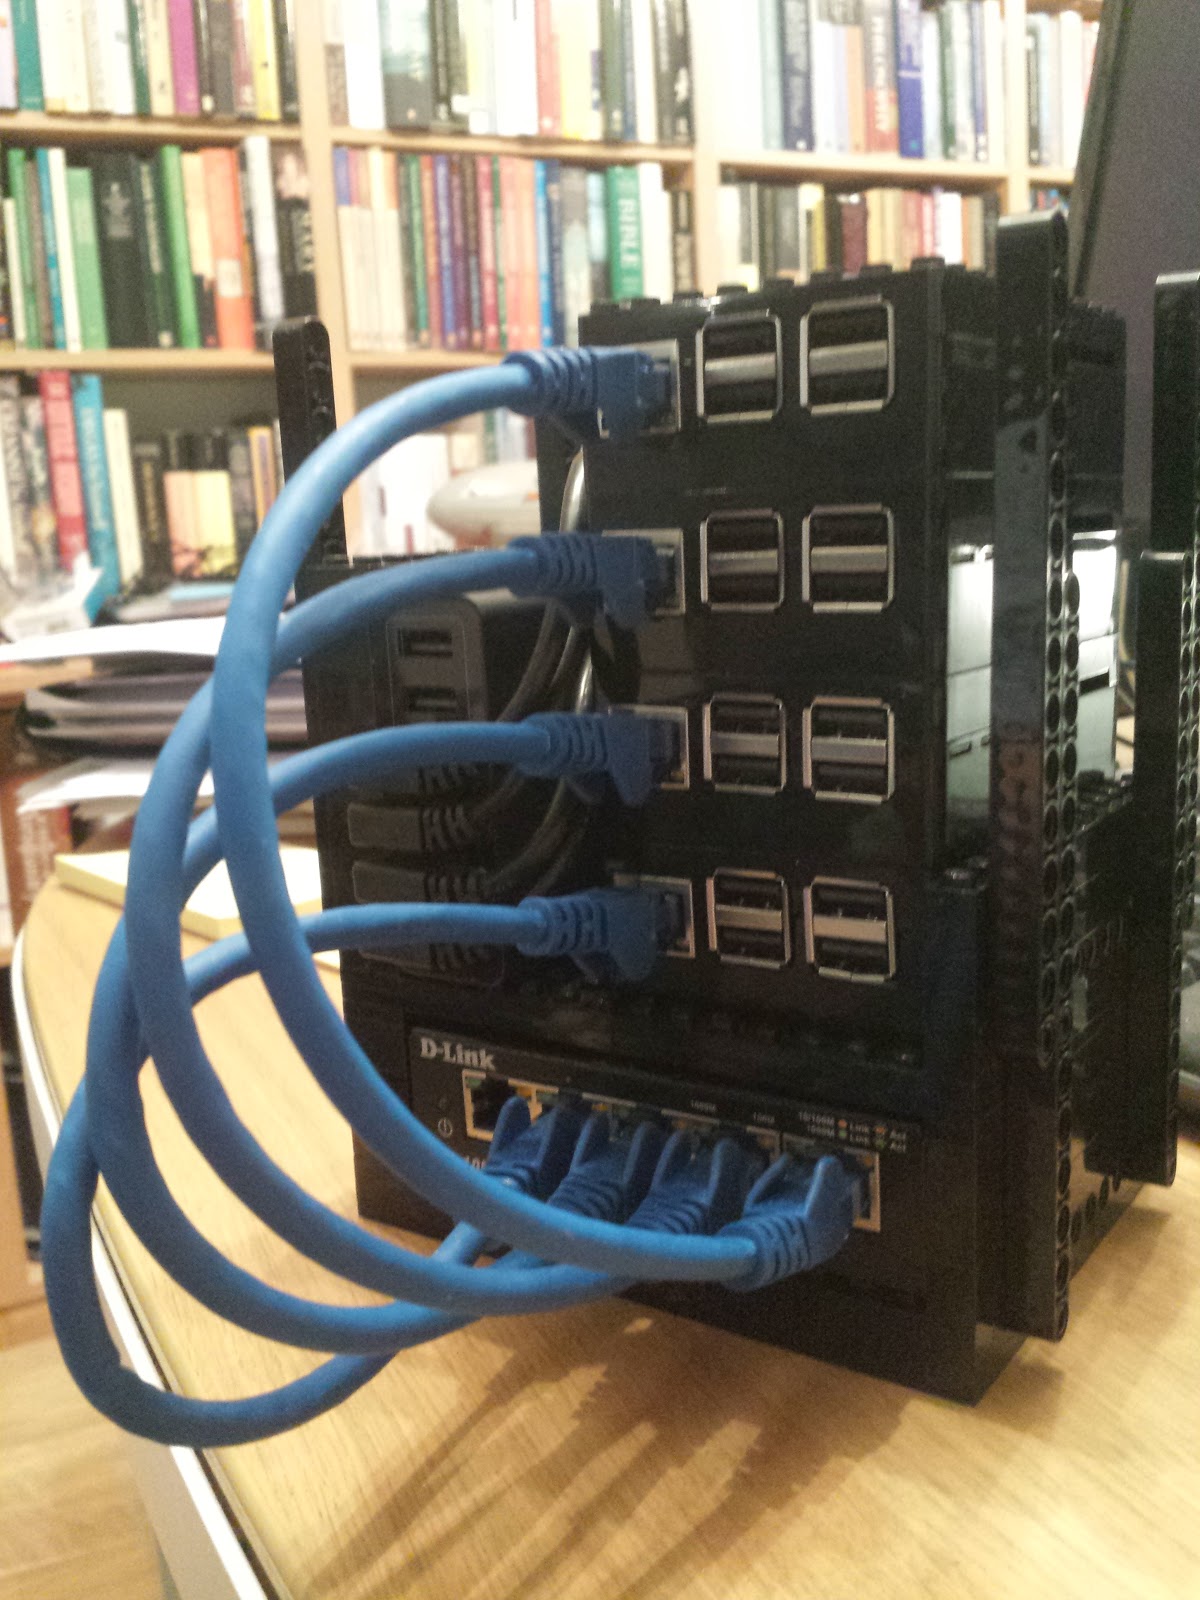
It deals with the occasional hangs in the camera capture process by
rebooting when they happen. A line in /etc/rc.local runs the program again.
# Program for PiDoorCam
# Detects motion, and when it spots some, takes a high resolution
# picture, and sends the picture to PiScreen
import io
import os
import picamera
import ftplib
import time
from datetime import datetime
from PIL import Image
import requests
camera = picamera.PiCamera()
picamera.PiCamera.CAPTURE_TIMEOUT = 30
# If we detect 100 pixels that changed by 30, we have seen movement.
#difference = 30
#pixels = 100
# Desensitise!
#difference = 30
difference = 50
pixels = 150
# May as well use the maximum resolution of the camera.
# This is for V1. V2 is 3280 x 2464.
width = 2592
height = 1944
# I copied this voodoo motion detection from somewhere. Changed the timeout
# setting above to prevent the occasional failures to complete captures.
def compare():
camera.resolution = (100, 75)
stream = io.BytesIO()
format = ‘bmp’
# Handle occasional ‘Timed out waiting for capture to end’
try:
camera.capture(stream, format)
except:
print (“Camera timed out, reboot needed!”)
os.system(“sudo reboot now”)
stream.seek(0)
im = Image.open(stream)
buffer = im.load()
stream.close()
return im, buffer
# Function to take a new high resolution picture, send it to PiScreen
# send it to my phone, and then delete it.
def newimage(width, height):
when = datetime.now()
filename = “door-%04d%02d%02d-%02d%02d%02d.jpg” % (when.year, when.month, when.day, when.hour, when.minute, when.second)
camera.resolution = (width, height)
camera.capture(filename)
connected = True
ftp = ftplib.FTP()
ftp.connect(“PiScreen”)
try:
ftp.login(“pi”,”******************”)
except ftplib.all_errors:
connected = False
print (“Failed to connect to server %s” % e)
if connected:
ftp.storbinary(‘STOR ‘+filename, open(filename, “rb”))
print (“Sent “, filename)
ftp.quit()
# Code to send the Pushover message. Make picture smaller first.
im = Image.open(filename)
im.resize((324,243),Image.ANTIALIAS)
im.save(filename)
r = requests.post(“https://api.pushover.net/1/messages.json”, data = {
“token”: “***********************************”,
“user”: “*************************************”,
“device”: “***********”,
“sound”: “intermission”,
“message”: filename
},
files = {
“attachment”: (filename, open(filename, “rb”), “image/jpeg”)
})
# Check r for problems – maybe put a delay here?
if r.status_code != 200:
print(“Pushover message failed.”)
else:
print(“Pushover accepted the message.”)
# Now delete the file.
os.remove(filename)
# Delay to avoid being nasty to Pushover server.
time.sleep(5)
# Main program.
camera.rotation = 180
print(“Running door.py”)
image1, buffer1 = compare()
newimage(width, height)
while (True):
image2, buffer2 = compare()
changedpixels = 0
for x in range(0, 100):
for y in range(0, 75):
pixdiff = abs(buffer1[x,y][1] – buffer2[x,y][1])
if pixdiff > difference:
changedpixels += 1
if changedpixels > pixels:
newimage(width, height)
image1 = image2
buffer1 = buffer2
Code below is an older version, the “error handling” doesn’t actually work.
# Program for PiDoorCam
# Detects motion, and when it spots some, takes a high resolution
# picture, and sends the picture to PiScreen
import io
import os
import picamera
import ftplib
import time
from datetime import datetime
from PIL import Image
import requests
camera = picamera.PiCamera()
picamera.PiCamera.CAPTURE_TIMEOUT = 30
# If we detect 100 pixels that changed by 30, we have seen movement.
#difference = 30
#pixels = 100
# Desensitise!
difference = 30
pixels = 150
# May as well use the maximum resolution of the camera.
# This is for V1. V2 is 3280 x 2464.
width = 2592
height = 1944
# I copied this voodoo motion detection from somewhere. Changed the timeout
# setting above to prevent the occasional failures to complete captures.
def compare():
camera.resolution = (100, 75)
stream = io.BytesIO()
format = ‘bmp’
# Handle occasional ‘Timed out waiting for capture to end’
try:
camera.capture(stream, format)
except:
print (“Retrying camera.capture()”)
camera.capture(stream, format)
stream.seek(0)
im = Image.open(stream)
buffer = im.load()
stream.close()
return im, buffer
# Function to take a new high resolution picture, send it to PiScreen
# send it to my phone, and then delete it.
def newimage(width, height):
when = datetime.now()
filename = “door-%04d%02d%02d-%02d%02d%02d.jpg” % (when.year, when.month, when.day, when.hour, when.minute, when.second)
camera.resolution = (width, height)
camera.capture(filename)
connected = True
ftp = ftplib.FTP()
ftp.connect(“PiScreen”)
try:
ftp.login(“pi”,”**********************************”)
except ftplib.all_errors:
connected = False
print (“Failed to connect to server %s” % e)
if connected:
ftp.storbinary(‘STOR ‘+filename, open(filename, “rb”))
print (“Sent “, filename)
ftp.quit()
# Code to send the Pushover message. Make picture smaller first.
im = Image.open(filename)
# im.resize((648,486),Image.ANTIALIAS)
im.resize((324,243),Image.ANTIALIAS)
im.save(filename)
r = requests.post(“https://api.pushover.net/1/messages.json”, data = {
“token”: “**********************************”,
“user”: “********************************”,
“device”: “************”,
“sound”: “intermission”,
“message”: filename
},
files = {
# “attachment”: (“image.jpg”, open(filename, “rb”), “image/jpeg”)
“attachment”: (filename, open(filename, “rb”), “image/jpeg”)
})
# Check r for problems – maybe put a delay here?
if r.status_code != 200:
print(“Pushover message failed.”)
else:
print(“Pushover accepted the message.”)
# Now delete the file.
os.remove(filename)
# Delay to avoid being nasty to Pushover server.
time.sleep(5)
# Main program.
camera.rotation = 180
print(“Running door.py”)
image1, buffer1 = compare()
newimage(width, height)
while (True):
image2, buffer2 = compare()
changedpixels = 0
for x in range(0, 100):
for y in range(0, 75):
pixdiff = abs(buffer1[x,y][1] – buffer2[x,y][1])
if pixdiff > difference:
changedpixels += 1
if changedpixels > pixels:
newimage(width, height)
image1 = image2
buffer1 = buffer2


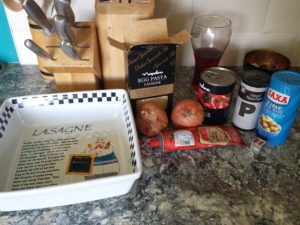 Here are some of the things I used to make a recent lasagne. It’s fairly hard to see, but there’s a bowl of home grown garlic at the back, on the right. Just push garlic cloves that are too small to bother peeling into the ground. A few months later, they will have multiplied enormously, and somehow pulled themselves down until they are six inches underground. I have no idea how they manage to do that, but they do. I must remember to ask my favourite botanist, if he ever visits us.
 This is the humble, yet powerful, Oxo cube that I used, to flavour the rather insipid looking beef mince. Some people tear the foil off, and crumble the cube with their fingers. Try this… Pull the little flaps out as shown, and hit the cube a couple of times
  with your palm, until it is flattened. Now you can just rip it and tip the powdered Oxo straight into the pan. Isn’t that clever? I would credit the source of the tip, if I could remember it.
 That meat will need to be browned properly, of course, before you carry on making the sauce, but you know that, don’t you? I wasn’t following a recipe, just doing what seemed likely to be the way I have made lasagne before.
 Now some recipes have you put layers of sauce in with the layers of meat and pasta. I don’t do that, mainly because it increases hugely the amount of sauce you will need, and tends to make the final dish sloppy. I have been known to put in layers of grated cheese, and that can work quite well, but this lasagne didn’t have any.
 ends up knowing how to do without measuring things. A lump of butter of a certain size. A big, but not too big, spoonful of flour. Do not forget Colman’s mustard powder, about half a teaspoonful. It’s not enough to make the sauce taste mustardy, but it will seem dull if you forget to put it in.
  The butter and flour have to be cooked until there is what one recipe book describes as a “biscuity smell”.
 cheese. Please use a decent Cheddar, not soapy cheap stuff.
 picture, along with a salad that miraculously appeared while the lasagne was cooking.